Installation Guide (Legacy Products)

For Rhapsody instruments (and Sordina) please click here. For everything else, keep reading.


If you are installing a Libre Wave virtual instrument the installation is done in two stages; first you’ll install the software plugin and standalone application, then you’ll install the samples.

If you are installing a Libre Wave effect plugin you’ll only need to follow the instructions for installing the software as there will be no samples to install.

Video tutorials are provided in addition to the written instructions.

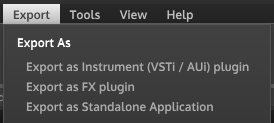
Installing the software

Every product includes separate installers for GNU/Linux, Windows, and Mac. Please follow the installation instructions below for your operating system.

GNU/Linux

If the download has a .zip extension then all you need to do is extract the file to the location of your choice. Usually this will be the .vst3 folder within your home folder.

If the installer has a .sh file extension it needs to be run from the terminal. The simplest way is to drag the installer file onto an open terminal window and press Enter. If you see a command not found error you will need to grant execute permissions to the installer, how you do this will vary depending on your OS. In Linux Mint you can right click the .sh file, select properties, click the permissions tab, and check the execute box.

The software license will be displayed. You can scroll down a whole page by pressing the Space Bar or a single line by pressing the Enter key.

Video: How to install on GNU/Linux
Running the installer from the terminal

Once you reach the end of the license you’ll be prompted to accept its terms. Type y if you accept the terms and want to continue the installation or n if you don’t and would like to exit. Then press the Enter key.

If you accepted the terms of the license you’ll be asked if you would like to install the VST plugin version of the software. Type y if you do and press the Enter key, you’ll then be prompted to enter a location to install the plugin. You should enter the full path to an existing directory, if the directory doesn’t exist the installer will ask you to choose another location. If the directory you choose requires root permissions then you’ll need to restart the installer with root access (sudo).

Enter the full path for the location you’d like to install the plugin

If the software includes a standalone application you’ll now be asked if you would like to install it. Type y if you do and press the Enter key, you’ll then be prompted to enter a location to install the standalone application. You should enter the full path to an existing directory, if the directory doesn’t exist the installer will ask you to choose another location. If the directory you choose requires root permissions then you’ll need to restart the installer with root access (sudo).

The standalone installation will also place the license file and application icon into the install directory. You can use this icon for any desktop or menu shortcuts you create for the standalone application.

Enter the full path for the location you’d like to install the standalone application

The software installation will now complete and you can move on to installing the samples.

Successful install

Windows

The Windows installer has a .exe file extension, double click it to launch the setup wizard. The first screen will present the software license, if you agree with its terms select I accept the agreement and then click Next.

License agreement
Video: How to install on Windows

If the library contains a standalone application you might be asked to select the location you’d like it installed.

On the next screen you’ll need to supply a location to install the 32bit version of the plugin. These don’t need to be the same location as each other or the same location where you will install the samples.

Choose a location to install the 32bit plugin

Now you need to select a location for the 64bit version of the plugin. This does not need to be the same location where you will install the samples.

Choose a location to install the 64bit plugin

You’ll now be given the opportunity to customise the installation. You can choose which components you’d like to install by marking the checkboxes next to them. Once you’ve made your selections click Next.

You can customize the installation

A final confirmation screen will be shown. Here you can review the installation configuration and if it’s correct click Install to begin the installation.

Final confirmation

Once the installation is complete click Finish. You can now move on to installing the samples.

Successful installation

MacOS

The MacOS installer has a .pkg file extension, double click it to start the setup process. If the installer is blocked by your system security you will need to open the MacOS security and privacy settings application and allow the installer to open.

Click Continue in the security prompt that pops up and then click the Continue button at the bottom of the window.

Security prompt

Read through the license document and if you accept its terms click Continue and then Agree.

Video: How to install on a Mac
Click agree if you accept the license terms

Select the hard drive on which you want to install the software. This doesn’t need to be the same as the location where you will install the samples.

Then click Continue.

Choose an install drive

The next screen allows you to confirm that you selected the correct install location and informs you of how much disk space the software requires. You can click the Customize button if you’d like to choose which components are installed. If the software includes a standalone version this will be installed in Applications folder.

Click Install.

You can customize the installation

You’ll be prompted to enter your password to confirm that you want the installation to proceed.

Password prompt

The installation process will begin and the on-screen progress bar will keep you informed of the current status.

Installation progress

You’ll see the following screen once the plugin installation is complete. Click Close and you can now move on to installing the samples.

Successful install

How to install the samples

Sample installation tool

If you’re installing a Libre Wave virtual instrument you will have received one or more .hr files. These contain the audio samples that need to be extracted.

When you open the instrument for the first time you will be presented with two buttons, click Install Samples.

You’ll then be prompted to select the file that ends in .hr1. Then you’ll be asked to select the location to extract the samples to.

This doesn’t need to be the same location where you installed the plugin. For the best performance it is generally recommended to install samples on an SSD.

When you have selected the destination folder the sample installation tool window will open. This provides you with two additional settings – Overwrite existing samples, and Delete Sample Archive after extration. For a first time install I recommend leaving both of these at their default value.

Click ok. You’ll then have a short wait while the samples are extracted to your chosen location.

After the process is complete you might see a prompt saying The sample directory does not exist, click the Ignore button. Now you’ll need to close and reopen the plugin or standalone application to complete the setup.

What to do if something goes wrong

Follow these instructions if something went wrong with the sample installation process or you’re updating to a new version of the samples.

Go to the folder that contains the configuration files for the sample library and delete the link file. Then reopen the sample library and you will again be prompted to install the samples.

The link file was created when you installed the software. The location of the file varies between operating systems:

  • GNU/Linux: /home/username/.config/Libre Wave/Plugin Name/LinkLinux
  • Windows: Users/username/AppData/Roaming/Libre Wave/Plugin Name/LinkWindows
  • MacOS:~/Library/Application Support/Libre Wave/Plugin Name/LinkOSX
  • You’ll need to hold down the ALT or Option key while opening the Go menu in order to be able to access the Library folder.

Replace username with your username and replace Plugin Name with the name of the plugin.

Moving the samples to a new location

Relocate the samples

If at some point after installation you move the samples to a different location you will need to redirect the sample libraries search path.

You may be prompted to do this when you run the library after moving the samples or you can do it manually by going into the settings page of the plugin and clicking the Change sample folder location button.

Troubleshooting

No sound

Check that the plugin is looking for the samples in the right location. You can do this in the Engine tab of the plugin’s settings screen. If the location is wrong you can redirect the plugin by clicking the Change sample folder location button.

The first time you launched the plugin you should have been prompted to either install the samples or locate them on your system. If you chose to locate rather than install the plugin will not function correctly. You’ll need to remove the plugin’s configuration files, relaunch the plugin, and the prompt to install the samples will reappear.

Please refer to the installation guide for more details.

GUI is too big

You can choose to scale the GUI up or down in the Engine section of the settings screen.

Hanging notes

If you find a situation that triggers hanging notes there is probably a sneaky bug in the script which I have missed. Legato scripting is the place where such bugs are often found hiding and I would not be surprised if some edge cases bring them to the surface.

Please create a MIDI file, as short and simple as possible, that consistently triggers the hanging notes. Send this to me attached to a support ticket along with other useful information such as the name of the plugin, the plugin version, the DAW you’re using, your operating system, the OS version, if possible a small mp3 file that demonstrates the issue, and anything else you think is relevant.

Building Libre Wave products from source

The development environment

If you’d like to build my software from source you’ll first need to build HISE which is the development environment I use to create my software. The HISE GitHub page has instructions for how to build it on different operating systems so please follow those. I recommend you use my fork of HISE rather than the upstream as I have made some modifications.

Building HISE from source rather than using the prebuilt binaries serves two purposes. Firstly it ensures that you are using the most recent version of HISE. Secondly it guarantees that you have the correct environment setup to build my software.

If you need assistance with building HISE please ask on the HISE forum.

Getting the source code

At the moment my source code is a little fragmented as I’m transferring from GitHub to Codeberg. You can find my GitHub repo here here and my Codeberg repo here.

For Rhapsody instruments you will need to download the necessary code from both repos.

You can download the source code as a zip file by clicking the Clone or Download button and selecting Download Zip. Once downloaded you should extract the zip file, which contains the HISE project folder for the product. Alternatively, if you are familiar with git, you can clone the repository and make a local git repo on your system for the product’s HISE project folder.

The GitHub repositories contain only the source code, they do not include any audio samples.

My HISE scripting framework

Downloading from GitHub

My scripting framework is an ever changing collection of script libraries, modules, and other stuff that I use across most of my HISE projects. In order to build any of my projects you will need the correct version of the framework for that particular project added to the project’s scripts folder. It’s very important that you use the correct framework version for the project you wish to build as the code in the framework varies between projects and a different version may not be compatible.

If you setup the project folder by downloading the source code zip file from GitHub you will need to go back to the GitHub page. Once there go into the Scripts folder, then into the HISE-Scripting-Framework folder (the folder name will also contain an @ symbol and some numbers), this will take you to the correct version of the framework for that project. Download the framework as a zip file the same way you downloaded the source code. Once downloaded open the zip file, inside will be a single folder with the same name as the framework folder on GitHub, take the contents of this folder and place it inside the /Scripts/HISE-Scripting-Framework/ folder inside the project folder.

If you cloned the project folder as a local git repository then all you need to do is import the framework as a git sub-module inside the project’s Scripts folder.

Opening the project

HISE’s File Menu

In HISE go to the File menu, click Load Project, and point the file browser that opens to the source code folder you downloaded earlier. Click ok when HISE asks if you would like to load the project’s .xml file. If HISE doesn’t prompt you to load the .xml file you can do it manually by opening the File menu, clicking Open XML, and then selecting the .xml file in the project’s XmlPresetBackups folder.

Preferences

In HISE go to the File menu and select Preferences. Scroll down to the Compiler Settings section and click the browse button in the HISE Path field. A file browser will appear, use this to select the folder on your computer that contains the HISE source code. Alternatively you can enter the path manually into the HISE path field. This path should point to the HISE source code, not the source code of the Libre Wave project you want to build.

HISE Compiler Settings
Compiler settings

In the Compiler Settings section you can also select the version of Visual Studio you will be using to compile the project if you are using Windows.

Export

HISE Export Menu
HISE’s Export Menu

Go to the Export menu and select an export option; for virtual instruments select either Export as Instrument (VSTi / AUi) plugin or Export as Standalone Application, for effects select Export as FX plugin. Click Cancel if HISE prompts you to check sample references, then select the export format from the drop-down menu that appears. The choice of export formats will vary depending on your operating system. Click ok on any further prompts that appear.

GNU/Linux

After a moment HISE will generate a build file and open the project’s Binaries directory. Open a terminal, cd to the Binaries folder and run the batchCompileLinux.sh file in that folder. This will start the build process and once complete the exported files will be placed in the following directories:

  • Standalone: & VST/VSTi Project Folder/Binaries/Builds/LinuxMakefile/build

Windows & MacOS

HISE will automatically generate the build files, a terminal window will pop-up, and the compilation process will start. Once the compilation is complete the output files will be placed in the following directories:

  • Windows
    • Standalone: Project Folder/Binaries/Compiled/App/
    • VST/VSTi: Project Folder/Binaries/Compiled/VST/
    • AAX: Project Folder/Binaries/Compiled/AAX/
  • MacOS
    • Standalone: Project Folder/Binaries/Compiled/
    • VST/VSTi: Users/apple/Library/Audio/Plug-Ins/VST/
    • AU/AUi: Users/apple/Library/Audio/Plug-Ins/Components/
    • AAX: Library/Application Support/Avid/Audio/Plug-Ins/

Installation guide

You’re just three steps away from firing up your new instrument for the first time.

1. Choose a password

If this is your first purchase from Libre Wave you’ll soon receive an email confirming your Libre Wave account creation and a link for you to set a password.

It could take up to an hour for the email to come through but usually it’s very quick. Check your junk/spam folder if you don’t see it in your inbox. Be sure to add @librewave.com to your email whitelist.

2. Download Rhapsody

Rhapsody is Libre Wave’s sample library installer, manager, and launcher. Click the button below to go to the Rhapsody download page and grab your copy for free.

3. Install Your Instrument or Plugin

Here’s a video showing the download and installation process for a Rhapsody instrument. Or keep reading if you prefer written instructions.

How to install an instrument in Rhapsody

1. Once Rhapsody is installed, open it up and log in with your Libre Wave account credentials (email/password).

2. Rhapsody will then synchronise with the Libre Wave server and you should see the cover image for the instrument(s) you purchased. There will be a green download button below this image. Click the button.

3. Choose a location to install the samples and click install. Then just wait for it to complete, it shouldn’t take long.

4. After the installation has finished you can click on the instrument’s cover image to launch the library.

Troubleshooting

If you’ve purchased a non-Rhapsody legacy product, such as O’Malley’s Irish Whistles, please visit this page.

If the download seems to be taking a little while to start just wait it out. It might be that the server is busy so give it a few minutes.

If you’re trying to install from within the plugin version of Rhapsody and it doesn’t seem to be working, try the standalone app version instead. If all else fails go with the manual installation method demonstrated in the video above.

If you use a firewall or anti-virus, make sure Rhapsody is whitelisted and allowed to access the internet.

There are more instructions on the Rhapsody page.

The process for installing effects plugins, such as Sordina, is exactly the same as installing instruments. However they cannot be launched from Rhapsody itself and must be loaded separately within your DAW, just like any other plugin.

If you need further assistance you can open a support ticket through your Libre Wave account dashboard and I’ll get back to you as quickly as possible.


Explore more from Libre Wave

Where’s the Software License?

I don’t want my software to take away your freedom so unless otherwise stated all Libre Wave software is released under the GPLv3 license and all audio samples are released under a Creative Commons Plus license. The complete license document combining the GPL, Creative Commons, and CC+ license is available here.

Why not release the samples under the GPL too?

The GPL license is intended for software and one of its requirements is that the user must have access to the software’s source code. Samples are audio files and don’t provide anything that is equivalent to source code, so the GPL is not really appropriate for samples. In addition to this the GPL requires all derivative works to be released under the same license, so providing GPL samples would require users to release their compositions under the GPL too.

I opted to use the standard Creative Commons Attribution-NonCommercial-ShareAlike license plus an additional license that grants extra permissions. Please contact me if you have any queries about the license terms.

Where are my download links?

Once your order status has changed to completed your download links will be activated. You’ll receive an email containing the links and they’ll also be available from your account dashboard.

If you don’t see the email in your inbox please check your junk mail and spam mail folders and make sure the librewave.com domain is on your spam filter’s white-list.

If you don’t see your download links in either your account or your email please open a support ticket.

If you’re unable to access your account then please contact me and provide your order details. It’s also important that you provide at least one alternative email address or other method by which I can contact you – because if you haven’t received your order email then it’s unlikely you’ll be able to receive any other emails from me at the email address you used when you placed your order.

Why wont you reply to my emails?

If you’ve purchased a product the best way to contact me is by opening a support ticket.

If you emailed me using the contact form on this website then you can be almost 100% sure that I have received the message. If it’s been more than a few days since you sent your message it’s possible that my response has gone to your junk mail folder or when you contacted me there was a typo in your email address and my reply is lost in cyberspace.

The first thing to do is check the junk mail or spam folder of your web-mail host (or desktop client if you use one). If you find my reply there you can move it to your inbox and add librewave.com to your safe senders white list.

If there is no reply from me in your junk mail folder then send me another message through the contact form making sure your email address is entered correctly. It would also be good to include an alternative contact method in your message so that I have more ways of responding to you and ensuring my reply reaches you.

Do you provide product support?

Before you contact me for support please check the Knowledge base to see if your question has already been answered.

Support is only provided for verified purchases from Libre Wave or affiliated resellers. If your purchase was made through this website you should open a support ticket.

If you purchased through an affiliated reseller please use the contact form and include your order ID or transaction reference so that your purchase can be verified.

I usually respond to support requests pretty quickly (within hours) but sometimes it can take me a little longer. Don’t forget to check your junk/spam email folder in case my reply has got lost on the way to you.

If there is a problem with the contact form you can email directly: support@librewave.com.